
 |
| The instructor after 'maki'-ing the gold powder onto the tray. |
Access
〒604-0884
京都府京都市中京区塀之内町637乾漆器店
(Kyōto-fu, Kyōto-shi, Nakagyō-ku, Heinouchichō, 637 Inui Shikki)
TEL: 075-231-3552
Closest Station: Marutamachi Station (Kyoto Municipal Subway Karasuma Line)
Maki-e Lesson Reservations Here
Maki-e Lesson Reservations Here
If you're traveling from Osaka, you can take the JR, Keihan or Hankyu Line to Kyoto, then transfer to the Kyoto subway line. Since we live in South Osaka city, we usually take the subway to Umeda, then switch to the JR line, but as I've grown more and more fed up with the crowds in Umeda, we decided to try a new route; we rode the subway all the way to Awaji Station, then transferred to an express train bound for Kawaramachi. After another quick transfer at Karasuma Station to Shijo-Karasuma on the subway, we arrived at Marutamachi Station in no time (well, it took about 1 hour and some change).
What is Maki-e
So, I was offered a chance to enjoy a little traditional Japanese crafting recently, and as a lover of crafts and all things 'komono', I answered with an enthused 'YES'.
 [GFDL (http://www.gnu.org/copyleft/fdl.html) or CC-BY-SA-3.0 (http://creativecommons.org/licenses/by-sa/3.0/)], via Wikimedia Commons") |
| By Pqks758 (漆器の板屏風より) [GFDL (http://www.gnu.org/copyleft/fdl.html) or CC-BY-SA-3.0 (http://creativecommons.org/licenses/by-sa/3.0/)], via Wikimedia Commons |
Maki-e (蒔絵) is the process of adding decorative designs to lacquered items (trays, pendants, bags even) through the careful application of more lacquer in intricate patterns. Before this lacquer dries, gold power, or other powdered metals, is brushes into the semi-wet lacquer, where dries into the pretty result you see above. It seems to have its roots in the Heian Era (e.g. Kyoto), so this lesson was a nice chance to experience a little traditional Kyoto.
The lesson takes you through the most basic maki-e process; first by creating the pattern, then applying the pattern stencil to your item (you can choose from an array of trays) and painting the pattern in urushi (varnish), and finally applying the gold powder to the varnish (the instructor does this part because, well, gold).
How to Reserve a Lesson
 |
| The UI is neat and easy to understand. |
This lesson is by reservation only, and I used the service Voyagin to make my reservation. Voyagin is great for those with little to no knowledge of the Japanese language that still want to participate in local activities. Though this shop is one of the rare examples of a local activity with an English website, I think Voyagin would be great for people coming to Japan for a short vacation that are looking for easy access to a variety of activities. They also provide unique tours and can help you with getting tickets to concerts or theme parks in Japan (hint hint for people trying to get to USJ). They also offer tours and activities in other countries in Asia, so if you'll be on this side of the globe for a while, I'd check them out.
For my activity, you only pay for the activity itself, while transportation is up to you. But other activities/tours do add transportation into the overall price, so be sure to read the find print.
Maki-e Lesson
 |
| My design getting pressed onto the tray's surface. |
The lesson itself is pretty straight-forward. After you enter the shop and get settled at the work table, the instructor starts you off with a quick maki-e history lesson (printed out, so you can take it home). Then you select your design stencil, or in my case, create a stencil of your design. Shota used the crane and rabbit motif, while I wanted to make something for our dear cat Bingley. Next, the instructor pressed the stencils into the trays and set up a piece of practice paper. You get a few minutes to practice your brush strokes with the varnish, but believe me when I tell you, you're not ready.
 |
| Painting on the varnish. |
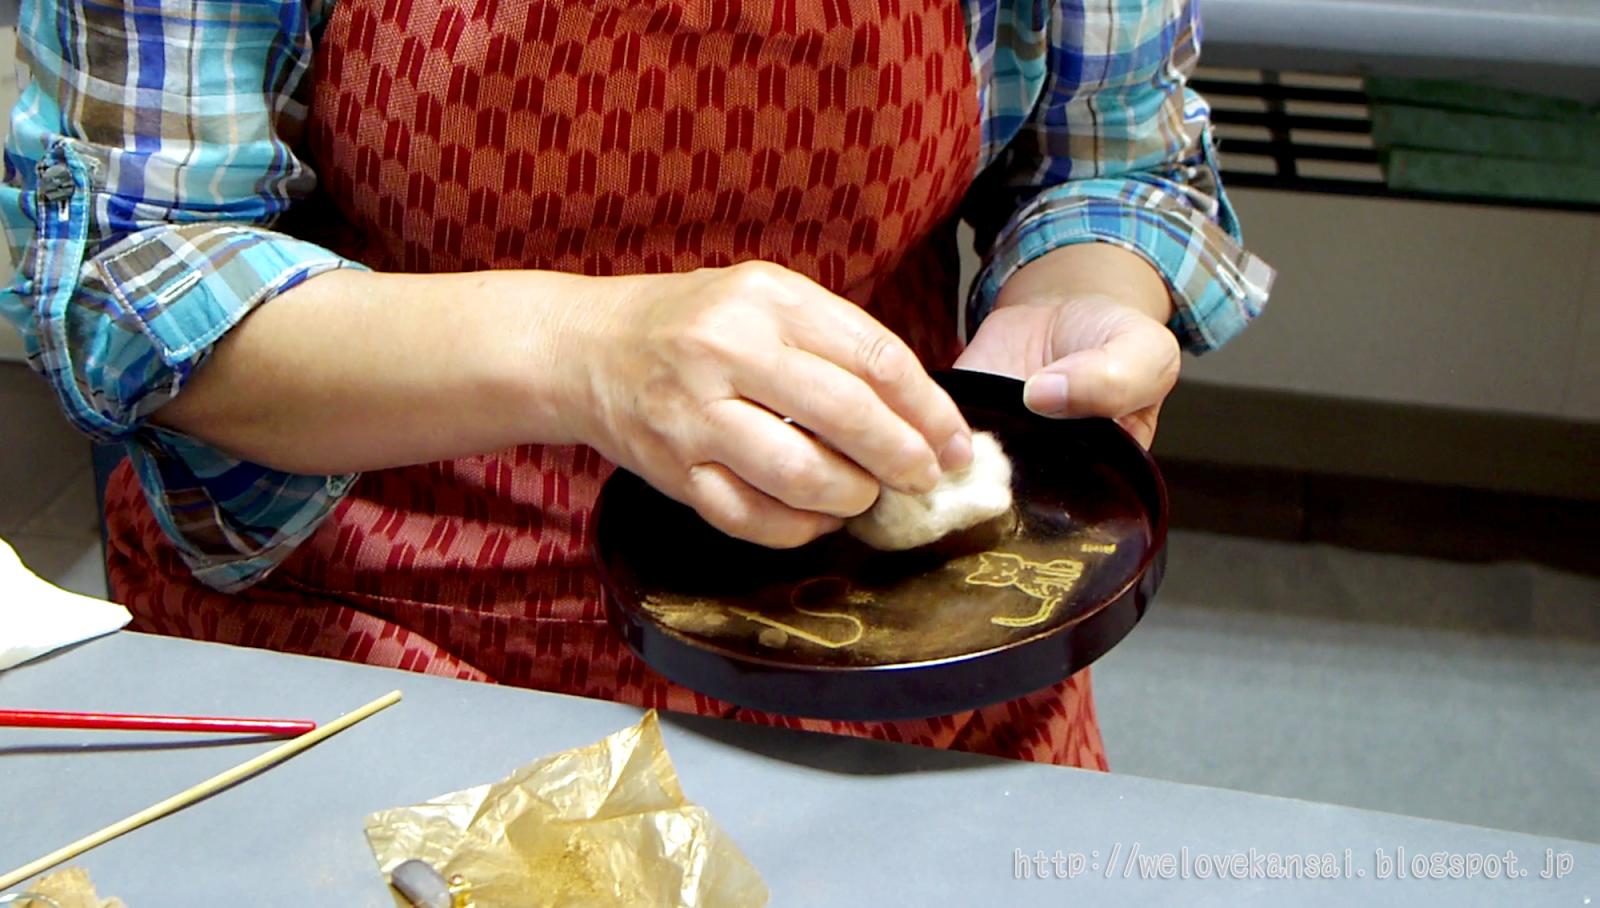 |
| Buffing the gold into the varnish. |
After the varnish dries a bit, the instructor sprinkles a little (real) gold onto the tray's surface, and buffs the beauty to perfection (though that really depends on your brushmanship?). There aren't that many steps to the lesson, but the process is so painstakingly delicate just when applying the design that it takes up the whole 1.5 lesson time.

Full video is done! Check it out below!
Links
We Love Kansai Youtube Channel
Voyagin Tours in Japan
Voyagin Tours in Kyoto
Voyagin Tours in Osaka
★Peaces★


No comments: